In the Metrics, Metrics, Metrics series of articles I wrote about PTC Integrity Lifecycle Manager, I talked about how you can use metrics information gathered from fields on your report to build custom reports, charts and dashboards. Now that the main series is complete, I will follow up with some articles that will describe some simple tricks and tips you can use to make the objects you create more effective, informative and more pleasing to the eye.
One of the things I noticed early on was that when I was creating my first custom reports in PTC Integrity Lifecycle Manger, was that sometimes the fields I wanted to use in my reports had long and sometimes unwieldy names, especially when you are trying to put them in a PTC Integrity Lifecycle Manager custom report.
In Metrics, Metrics, Metrics: Part 2, I built a simple back trace report that looked something like this:
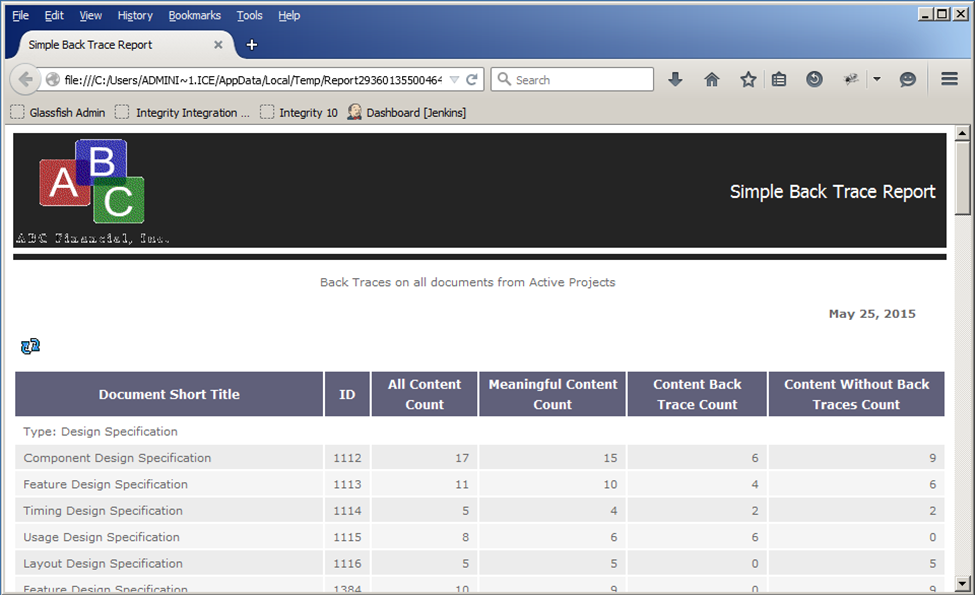
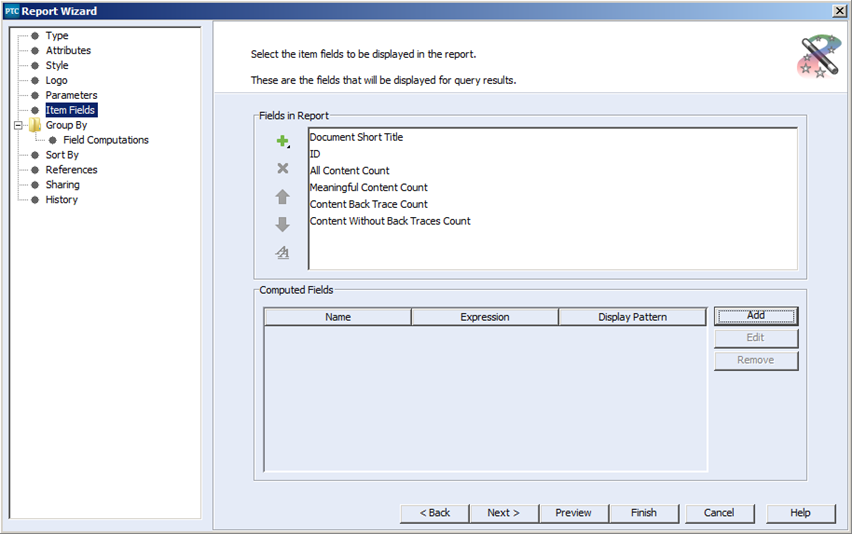
By default in PTC Integrity Lifecycle Manager custom reports, the field name becomes the column header. But say you don’t want your column headers to be that wordy, well there is a way around that. You can use a simple computation to retrieve the value you are looking for, and label the column anything you want. For example when you get to the Item fields dialog on the Report wizard, simply select the Add button within the Computed fields box:
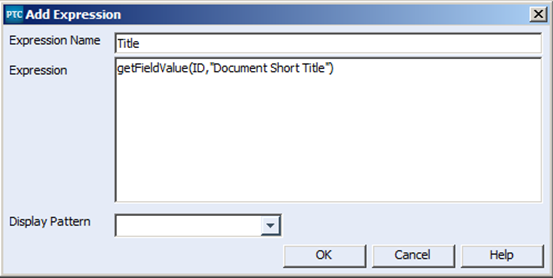
This will open the Add Expression dialog, from there you just fill in the Expression Name, which will be your new column header, then use the getFieldValue computation to retrieve the information you are looking for. Depending on whether or not you are retrieving a numeric value, you can choose to include a display pattern or not. In this case I have created a new version of the Document Short Title for my report:
When I am done, I select OK, and reposition my new computation where I had the original “Document Short Title” column, which I have deleted of course:
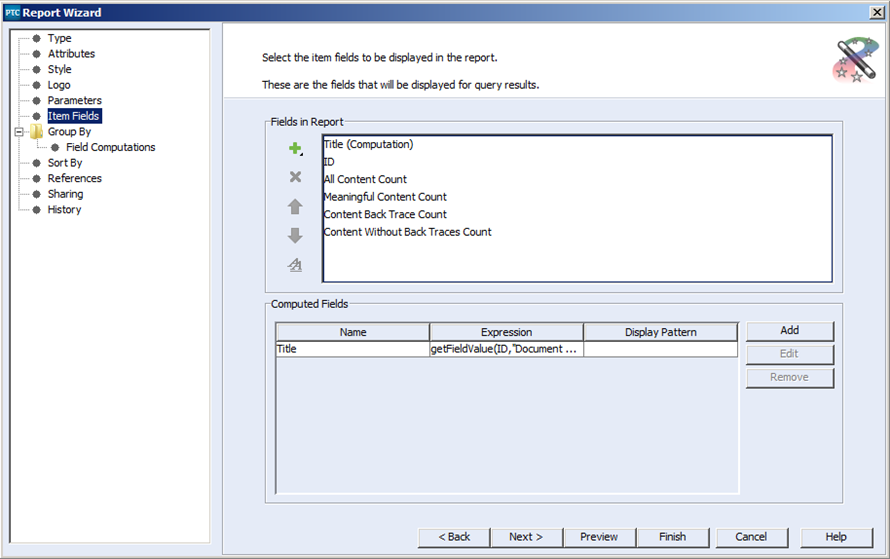
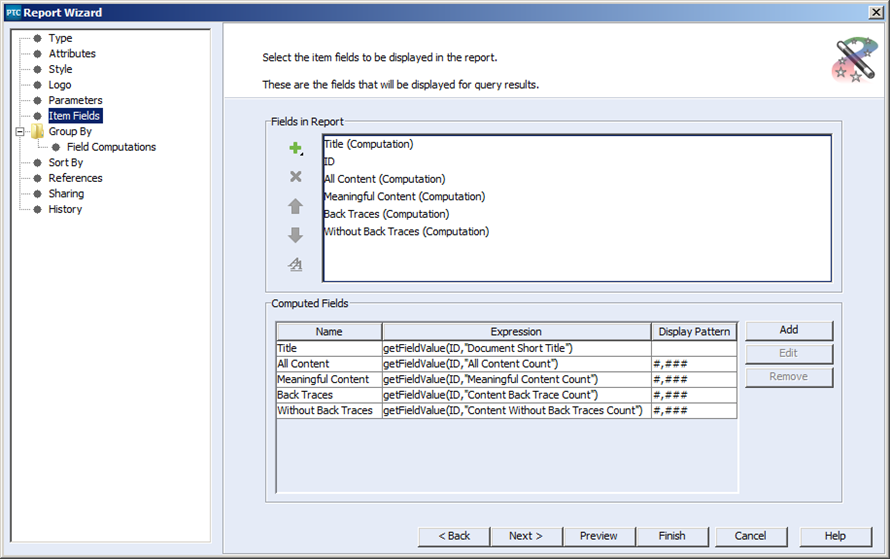
After I have replaced all the columns with my new computations, the Item Fields panel of the Report Wizard will look something like this:
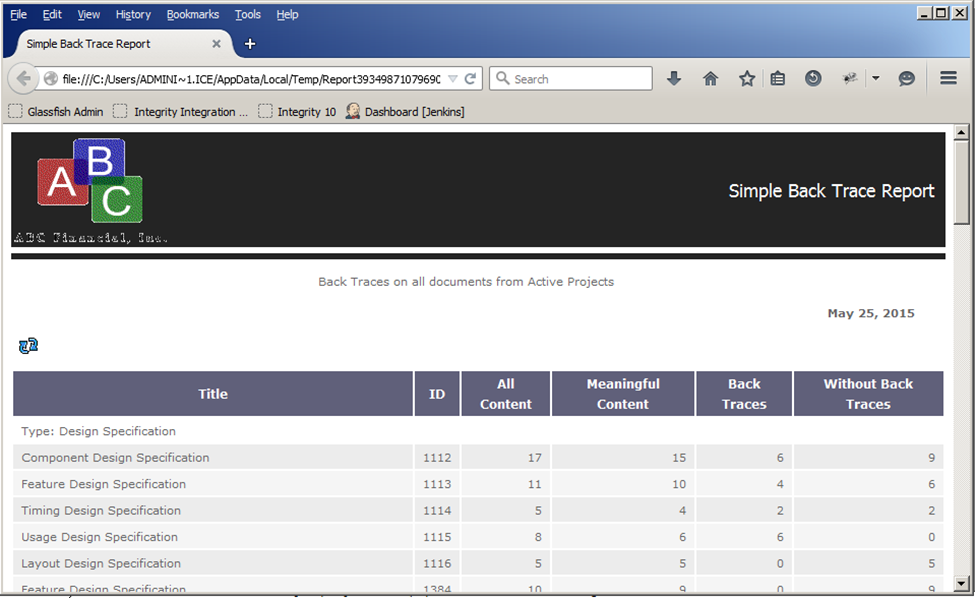
Once you are done here you can save your report, and see how it’s been updated:
I hope that you will find this to be a handy little trick to assist you in your future report writing efforts. Often times a little trick like this can make the difference between a report that is professional, readable and well received and one that isn’t. In future blog articles, I may add a few more little tips and tricks that will help with your report writing in PTC Integrity Lifecycle Manager.
Next Steps:
- Read the other articles in my “Metrics, Metrics, Metrics in PTC Integrity” series:
- Contact SPK and Associates to see how we can help your organization with our ALM, PLM, and Engineering Tools Support services.
- Read our White Papers & Case Studies for examples of how SPK leverages technology to advance engineering and business for our clients.


